Key Takeaways
- Solar power is a cost-effective and eco-friendly energy solution for tiny homes.
- Calculating your energy needs is the first step in choosing the right solar setup.
- Selecting high-efficiency solar panels and the correct battery system is essential for small spaces.
- Installation involves securing permits, mounting panels, wiring, and connecting to batteries and an inverter.
- Regular maintenance and monitoring ensure your system runs smoothly and efficiently.
Why Solar Power and Tiny Homes Are a Perfect Match
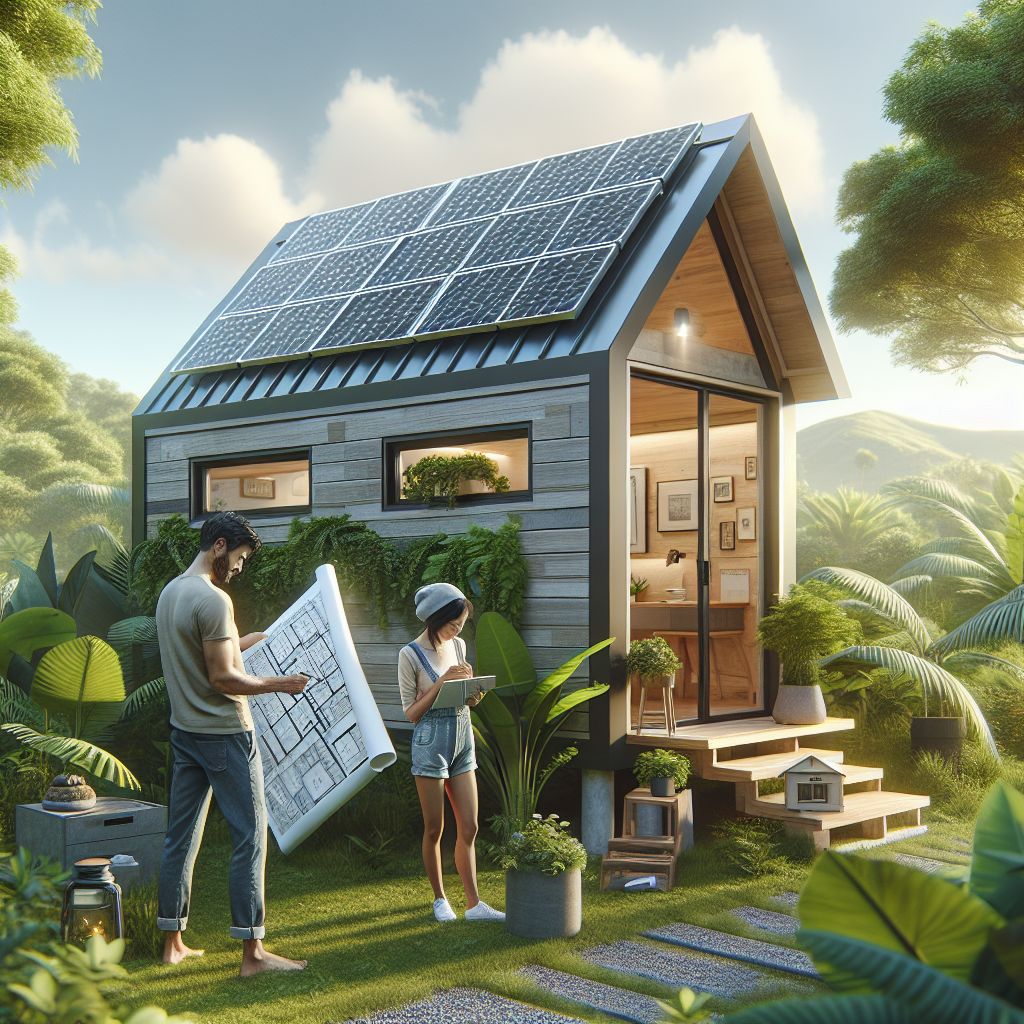
Imagine having the freedom to live anywhere, with the sun as your power source. That’s what solar power offers to tiny home enthusiasts. Tiny homes and solar power are like peanut butter and jelly – they just make sense together. Solar panels can provide clean, renewable energy that’s perfectly suited to the compact and efficient lifestyle of tiny home living.
Less Space, More Efficiency
In a tiny home, space is a premium. That’s why solar panels are the perfect match; they can be installed on rooftops, walls, or even on the ground. They don’t require additional space, and they turn your home into an energy-producing powerhouse. Plus, the advancements in solar technology mean that even a small number of panels can generate a significant amount of power.
Environmental and Financial Benefits
Using solar power isn’t just good for the planet; it’s also kind on your wallet. Once the initial setup costs are covered, the sun’s energy is completely free. This means that over time, your investment pays off, and you’ll save money on electricity bills. Plus, you’re reducing your carbon footprint, which is a win for the environment.
Laying the Groundwork for Your Solar Installation
Before you start buying panels and climbing onto your roof, there’s some groundwork to lay. You need to understand your energy requirements, choose the right equipment, and plan your installation carefully. This preparation ensures that your solar system will meet your needs and comply with all regulations.
Calculating Energy Needs
To size your solar system correctly, you need to know how much energy you use. Start by listing all your appliances and their wattage. Next, estimate how many hours a day you use each one. This will give you a daily watt-hour total. For example, if you have a light that uses 10 watts and it’s on for 5 hours a day, that’s 50 watt-hours per day.
Choosing the Correct Solar Panels
Not all solar panels are created equal. For tiny homes, you want panels that are efficient and durable. Look for monocrystalline panels; they’re more efficient than polycrystalline ones, meaning you’ll get more power per square inch, which is vital when space is limited.
Understanding Solar Batteries
Batteries store the energy your panels generate, so you have power when the sun isn’t shining. For a tiny home, you’ll want batteries that are compact, have a long life, and require minimal maintenance. Lithium-ion batteries are a popular choice because they meet all these criteria.
Now, let’s roll up our sleeves and dive into the nuts and bolts of installing your solar power system.

Illuminate Your Home: A Step-by-Step Guide to Installing Solar Power
Selecting the Ideal Location
Choosing where to place your solar panels is a critical decision. You want to maximize exposure to sunlight while considering the unique layout of your tiny home. Ideally, the roof is the best spot for efficiency, but if that’s not possible, don’t fret. Ground-mounted systems can be equally effective if positioned correctly. Remember, the goal is unobstructed access to the sun for the majority of the day.
Example: If your roof slopes southward, that’s perfect for northern hemisphere homes. The panels should be angled to catch the most sunlight, which is typically around a 30 to 45-degree angle.
Consider seasonal changes too. The sun’s path changes throughout the year, so ensure nearby trees or structures won’t cast shadows on your panels during different seasons.
Mounting Hardware and Tools Required
Once you’ve selected the location, it’s time to gather your mounting hardware and tools. You’ll need a mounting system designed for your specific type of roof or ground setup, which typically includes brackets, rails, and clamps. Ensure you have a drill, wrenches, and screwdrivers for the installation process.
Don’t skimp on the quality of your mounting system. It needs to withstand the elements and keep your panels secure for decades. Stainless steel or aluminum are good choices for durability and corrosion resistance.
Mounting Solar Panels
Mounting your solar panels is a process that requires precision and safety. Begin by attaching the mounting brackets to your roof or ground frame, ensuring they’re anchored securely. Next, attach the rails to the brackets, and then the panels to the rails. It’s essential to follow the manufacturer’s instructions to the letter here.
Wiring and Electrical Safety
Wiring your solar system must be done with the utmost care to prevent accidents and ensure efficiency. If you’re not confident in your electrical skills, this is the time to call in a professional.
Run the wiring from your solar panels to the charge controller, and then to the batteries and inverter, making sure to match the positive and negative connections correctly. Use weatherproof connectors to maintain the integrity of your system.
- Always turn off the main power before starting electrical work.
- Use proper gauge wiring as recommended by the solar panel manufacturer.
- Ensure all connections are tight and secure to prevent electrical fires.
- Use conduit to protect wiring from the elements and potential damage.
Remember, safety is paramount. If you’re ever in doubt, consult a professional electrician.
Connecting to a Charge Controller and Batteries
The charge controller is your solar system’s best friend. It regulates the voltage and current coming from the panels to the batteries, preventing overcharging and damage. Connect the wires from the solar panels to the charge controller, and then from the controller to the batteries, respecting the polarity.
When it comes to batteries, ensure they’re well-ventilated and stored in a temperature-controlled environment to maximize their lifespan. The connection should be secure, but not so tight that it damages the battery terminals.
Setting up Your Power Inverter
The inverter is the heart of your solar power system. It converts the DC electricity stored in your batteries into the AC electricity that powers your home’s appliances. Connect the inverter to the batteries with the correct size cables and install a fuse or circuit breaker between them for safety.
Place the inverter as close to the batteries as possible to reduce voltage drop, but also in a spot that’s accessible for monitoring and maintenance. After everything is connected, you can turn the system on and test it with a few appliances.

Post-Installation: Keeping Your System in Check
After installation, your work isn’t over. Maintaining your solar power system is key to its longevity and efficiency. Regularly cleaning your panels, checking for any loose wires or corrosion, and monitoring your system’s performance are all part of good solar system housekeeping.
Most importantly, keep an eye on your batteries. They’re often the first component to show signs of wear, so regular checks are vital. Ensure they’re charged correctly, and the connections remain clean and tight.
Regular Maintenance Tips
Here’s how to keep your solar power system in top shape:
- Inspect solar panels for dirt, debris, or snow. Clean them gently with water and a non-abrasive sponge.
- Check all wiring and connections quarterly for signs of wear or damage.
- Ensure the charge controller displays are functioning and showing the correct information.
- Keep the area around your batteries clean and ensure they’re at the correct temperature.
Maintenance doesn’t need to be complicated, but it does need to be regular.
Monitoring System Performance
Monitoring is essential to understand how well your system is performing. Most charge controllers come with monitoring capabilities, either on the unit itself or via a connected app. Keep an eye on the energy produced and consumed, and compare it to your initial calculations to ensure everything is running as expected.
Upgrading Your Solar Setup
As your energy needs evolve, so too might your solar system. Adding panels or batteries is always an option if you find you need more power. Just make sure your charge controller and inverter can handle the increased load. Upgrading components like your inverter for more efficient models can also improve your system’s performance.
Realizing the Full Potential of Your Solar Tiny Home
Now that your solar system is up and running, it’s time to make the most of it. Use energy-efficient appliances, LED lighting, and smart power strips to reduce waste. Consider using timers or smart systems to control when and how you use power, ensuring you use it when it’s most abundant.
If you’re producing more power than you use, you might also be able to sell it back to the grid or store it for later use. This not only maximizes your solar investment but also supports the grid with clean, renewable energy.
Maximizing Energy Usage
Maximizing your energy usage goes beyond the installation of solar panels; it’s about creating a lifestyle that’s both energy-efficient and sustainable. Start by using appliances that have a low energy draw. Swap out old light bulbs for LEDs, which use a fraction of the electricity and last much longer. Consider your usage patterns, too. Run high-energy appliances like washing machines during the day when your solar panels are producing the most electricity.
Integrating Smart Home Devices
Smart home devices are not just fancy gadgets; they are practical tools that can help manage your energy use. Smart plugs can turn off appliances remotely, and energy monitors can provide real-time feedback on your electricity consumption. By integrating these devices, you can ensure that you’re only using power when necessary and that none is going to waste.
Leveraging Excess Power
If you find that your solar system is generating more power than you need, there are a couple of ways to leverage this excess energy. You can store it in additional batteries for use during overcast days, or you could look into net metering, a program many utilities offer that allows you to sell excess electricity back to the grid. This not only gives you a credit on your utility bill but also contributes clean energy to your community.

Frequently Asked Questions (FAQ)
How much does a solar panel setup cost for a tiny home?
The cost of a solar panel setup for a tiny home varies widely based on your energy needs, the type of panels you choose, and whether you need a battery backup system. On average, a small system without batteries can start at around $1,000, while a more comprehensive system with batteries might range from $3,000 to $5,000 or more. Remember, these are initial costs that can be offset by the savings on your energy bills over time.
How long do solar panels last?
Solar panels are built to last. Most come with a warranty of 25 to 30 years, and many can continue to produce electricity well beyond that, albeit at a reduced efficiency. The lifespan of your solar panels will depend on the quality of the panels, the climate they’re in, and how well they’re maintained.
Can I install solar panels myself?
Yes, with the right tools and knowledge, you can install solar panels yourself. However, it’s crucial to understand that working with electricity can be dangerous, and installing solar panels often involves working at heights. If you’re not confident in your ability to safely install the panels, it’s wise to hire a professional.
How do I size my solar power system?
To size your solar power system, start by calculating your daily energy usage in watt-hours. Then, factor in the average number of sunlight hours your location receives. You’ll want a system that can generate enough power to cover your daily usage. It’s a good idea to add a margin of about 25% to account for inefficiencies and unexpected increases in energy use.
What maintenance is required for solar panels?
Solar panels require minimal maintenance. The most important task is to keep them clean and free of debris like leaves or snow, which can block sunlight and reduce efficiency. You should also check the mounting system and wiring periodically to ensure everything is secure and intact. Beyond that, just monitor your system’s performance to catch any potential issues early.


